This recipe walks you through how to make homemade slow cooker bone broth. It is possible to make bone broth in less than 24 hours, however you won’t reap as many of the benefits that come from boiling the bones for longer periods of time.
The longer you boil the bones, the more you draw out the nutrients inside them such as calcium, magnesium, zinc, vitamin A and amino acids, among others. When you boil bones that also contain joints and cartilage, you draw out the gelatin which is what gives rich bone broths that “Jell-O” feel when you take it out of the fridge.
Bone broth is a great way to get all the health benefits and nutrition of eating animal bones, cartilage, and connective tissue without actually eating it. I hate the texture of cartilage when I bite into some!
I always say that you have a good bone broth when you can tip it upside down and it completely stays in place and doesn’t spill all over the floor! 😆 Disclaimer: this only works after it has been refrigerated. Don’t try this when your bone broth is still warm or room temperature, or you will have a mess on your hands.
Read more about bone broth benefits.
Recipe substitutions or variations
Choosing your bones: In this 24 hour bone broth recipe, I don’t specify which types of bones to use, mostly because this recipe can be used for any type of bones you have. As an example, this recipe works great with:
- Carcass of a whole chicken (or rotisserie chicken), turkey or duck after you have removed all of the edible pieces of meat off of it
- A large ham bone
- A bag of soup bones from the store (from pork, beef or otherwise)
- Leftover bones that you have saved up from chicken thighs, chicken wings, or drumsticks
- Leftover beef bones from bone-in beef or pork steaks and roasts
- Chicken feet, pork hocks or any other type of slightly creepy looking bag of bones that you can find at the store 😬😆
Add apple cider vinegar or not?: I have read that adding apple cider vinegar to your bone broth before cooking can help to break down and extract more of the nutrients and collagen out of the bones. Whether this is the case or not, I personally don’t add it to my own broth recipes because I am not a huge fan of the taste that it adds. My advice would be to do some research yourself and decide whether you want to add it to your broth. I can guarantee you though that even without apple cider vinegar your broth will turn out absolutely fantastic.
Adding additional vegetables or seasonings: Whether you add any additional vegetables, garlic, onions or seasonings to your bone broth is absolutely up to you. This comes down more to personal preference. I generally do not add anything other than bones, water and salt to mine so that later depending on the dish I am making, I can add whatever seasonings make sense for that dish.
Homemade chicken stock, beef broth, or homemade soups can easily be made as part of this process. Just add ingredients like bay leaf, fresh herbs, lemon juice, celery stalks or other vegetable scraps in with your bones and water. Remember that anything that gets added at this step will get discarded with the bones after cooking so don’t add your chicken soup ingredients (if you’re planning to make homemade chicken broth) at this stage.
Using a large pot or pressure cooker instead of a crock pot: Broth can be made in many different ways. In this recipe I only cover how to make bone broth in a crock pot, but if you don’t have a crock pot check out this other recipe for making it in a pressure cooker or in a pot on the stove.
Recipe pairing ideas
Bone broth can be consumed in many different ways:
- Drink it straight out of a mug
- Use it to make any type of soup (it’s great with my ham bone split pea soup recipe)
- Use it to make homemade gravy
- Use it in any recipe that calls for broth
Recipe FAQs
What are the best bones for bone broth?
The best bones for broth are generally ones that contain the most bone marrow, joints and cartilage. This is where you will find most of the nutrients and collagen/gelatin that you’ll be able to pull from the bones during the boiling process. Most grocery stores sell soup bones that are thick and full of bone marrow. To get joints and cartilage, go for whole chickens, turkeys or ducks and then use the entire carcass in your bone broth. Chicken feet are also known to be rich in cartilage, but that’s assuming you can get over the idea of boiling chicken feet. I’m not quite there myself. 😆
Is it cheaper to make your own bone broth?
Assuming you are purchasing meat that still has the bones in it (such as whole chicken, turkey or duck) or meat that has not had the bones removed, then it would absolutely be cheaper to make your own bone broth as opposed to buying it. Quite often I find that when you buy meat that still has the bones in and skin on, it is often cheaper than buying it skinless/boneless. So you will likely save money on buying the meat in the first place, and then you’ve got your bones for making bone broth for free.
How many times can you boil bones for broth?
Depending on how many bones you start with, and how rich they are in bone marrow, cartilage and joints, you can often get up to two batches of bone broth out of one set of bones. Your first batch may be a lot more rich and full of gelatin, but your second batch will still make a nice broth. You could choose to combine both batches of bone broth, or keep them separate and use them for different purposes depending on whether you need a really rich broth or not.
Should I skim the layer of fat off bone broth?
It really comes down to choice, whether you skim the fat off your bone broth or not. I personally find it much more satisfying and tasty with some additional fat in it, but if you are eating a lower fat or lower calorie diet, you may choose to skim it off.
Can you make bone broth without apple cider vinegar?
Yes, apple cider vinegar is not essential to making bone broth and even without it you will end up with a rich and nourishing bone broth. Not using apple cider vinegar will not impact the outcome of this recipe.
Can I leave meat on bones for bone broth?
Yes, in fact leaving a small amount of meat and skin on the bones will increase the flavor of your bone broth and will make it taste a lot more like the classic meat broths you are used to. I always try to include a bit of meat and skin in my 24 hour bone broth if I can.
Why does my bone broth not gel?
If you are finding that your bone broth does not gel, you may not be using bones that are rich enough in joint and cartilage. However if you are using bones that are rich in joint and cartilage and are still not getting a good gel, you may not be cooking your bone broth for long enough to pull out the gelatin in sufficient amounts.
Is it safe to cook bone broth overnight?
When cooking bone broth in a crock pot on low, it is safe to leave it cooking overnight. Make sure that your crock pot is not close to anything else on the counter though, and make sure that you leave about 1 to 2 inches at the top of the slow cooker so that the broth does not bubble over during the night. Your slow cooker must be set to low, I don’t recommend leaving your crock pot on high overnight.
Do you have to cook bone broth for 24 hours?
You do not have to cook bone broth for 24 hours, however I have found that cooking it for a long period of time (24 hours) provides the best results and pulls out the most nutrients and gelatin. If you don’t have a long time, you could also cook it 8 – 12 hours, but just keep in mind that it won’t be as rich after the shorter cooking time.
Can I cook bone broth in an instant pot?
Yes! I don’t think you get the same gut health benefits if you use the pressure cook setting though but your instant pot has a slow cooker option so just use that! Put all your leftover chicken bones in (if using chicken) and cover with enough water that everything is fully submerged.
Can I cook this on the stove top?
Yes! just bring everything to a boil and turn it down to low heat and simmer. Maybe give it a stir every few hours to that nothing gets stuck to the bottom during the cooking process. I do not recommend leaving it to cook on the stove overnight while you are sleeping though.
Tried my crockpot bone broth recipe?
Please leave me a rating and review below, and post a picture of the dish to Instagram and tag me at @foodsnfeels 🙌
I hope you found this guide on how to make bone broth in a crock pot helpful. Please leave a comment or review and let me know how yours turned out!
You might also like
If you liked this recipe, check out my other nose to tail recipes:
If you are looking for more healthy recipes, download one of my free seven day meal plans!
How to Make Bone Broth in a Crock Pot
Ingredients
- 2 lb bones (or enough to comfortably fill your crockpot with at least 3-4 inches of the room at the top)
- 1/2 gallon water (or enough to cover the bones while leaving at least 2 inches of room at the top of your crockpot)
- 1 tsp salt (optional – for flavour)
Instructions
- Fill your crockpot with your bones, meat bits and skin.
- Fill the crockpot with water until the bones are fully covered – making sure to leave at least 2 inches of room at the top.
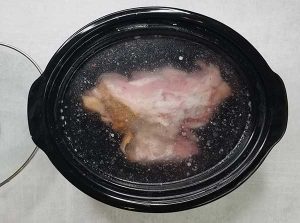
- Add salt (optional).
- Plug in your slow cooker and set to low. This works best with slow cookers that won’t automatically turn off after a certain amount of time. If your slow cooker can only be set to a maximum of eight hours, time this out so that you can reset it before you go to bed as well as when you wake up again the next morning.
- Let your broth simmer on low for up to 24 hours.
- Once 24 hours have passed, unplug your crockpot and let it cool 30 to 60 minutes.
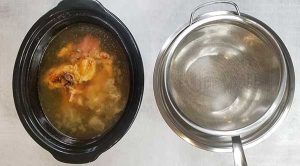
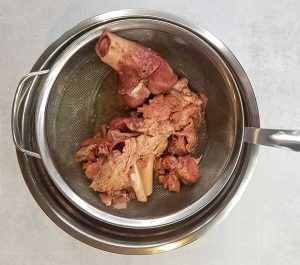
- Cover a large bowl with a large fine mesh strainer and carefully (using oven mitts if necessary) pour the broth and bones over the strainer into the bowl.
- Once all the broth has dripped through, you can throw out your bones. You can also save your bones if you want to make a second batch with them.
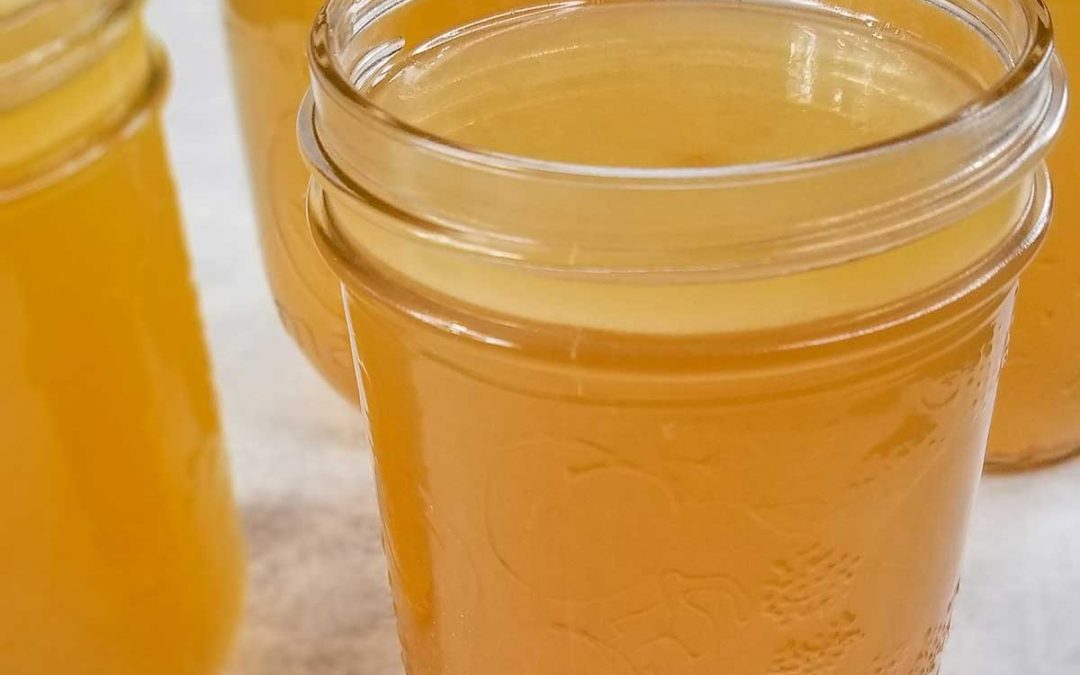
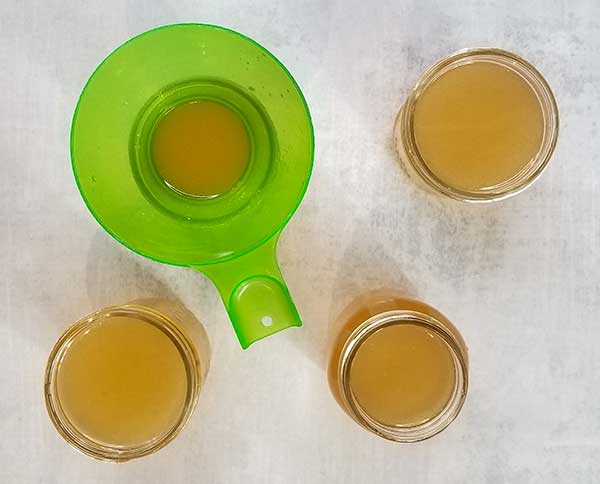
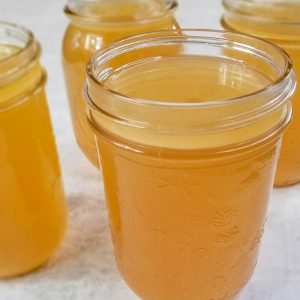
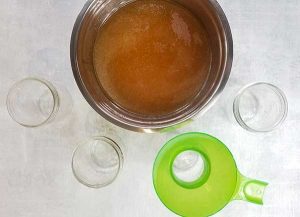
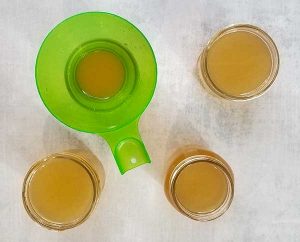
- Get out roughly 4 small Mason jars (this will depend on the size of your crock pot and how much broth it will produce). Using a Mason jar funnel (often used for canning), pour your strained bone broth into each Mason jar, leaving at least 2 inches or so of room at the top. This is so that if/when you freeze your bone broth, the Mason jars will not crack as the broth expands while freezing.
- Leave your Mason jars on the counter until they are fully at room temperature. Screw on the Mason jar lids but don’t fully seal them. This will allow the broth to breath so that when you freeze them, the jars won’t crack as the liquid expands.
- Once your broth has frozen completely, you can seal the lids on the rest of the way. Another way to freeze your homemade stock is to put it in ice cube trays so that you can pull it out and use it as needed.
- You may also choose to keep your homemade broth in the fridge, but if so I would suggest using it up within one week.
Nutrition
Disclaimer: This recipe post contains Amazon affiliate links. This means that if you click on a link and make a purchase, I will receive a small commission (at no extra cost to you). This helps support me so that I can continue to put out high quality, free recipes for you guys! Thank you 😁🙌

Tara Klippert is a Registered Health and Nutrition Counselor and holds a diploma in Holistic Nutrition and Health Coaching. She shares her gluten free, dairy free & allergy friendly recipes.
 Welcome to my blog! I share my *healthified* comfort food recipes that work with a variety of different diet approaches. AND all of my recipes are 100% gluten and dairy free.
Recent Comments